
Beyond Over-the-Patient Delivery – The Shift Toward Cart-Based Dental Systems
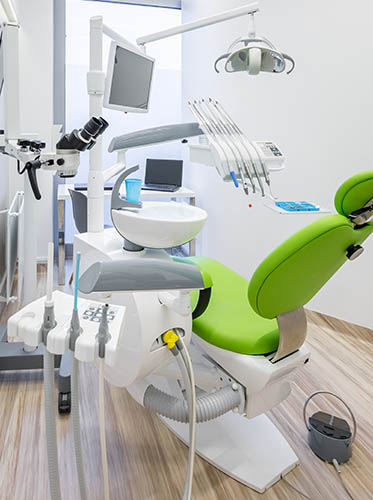
 Dental handpiece delivery has evolved over the last fifty years, moving away from side pedestal-mounted units with standing procedures. As the dental industry adopted “sit down” dentistry as a standard, the dental unit remained in the same position with a post and a horizontal arm replacing where the traditional pedestal unit was previously. As a result, it meant that the dental delivery unit moved “over the patient” suspended by arms resembling a historical belt-driven handpiece.
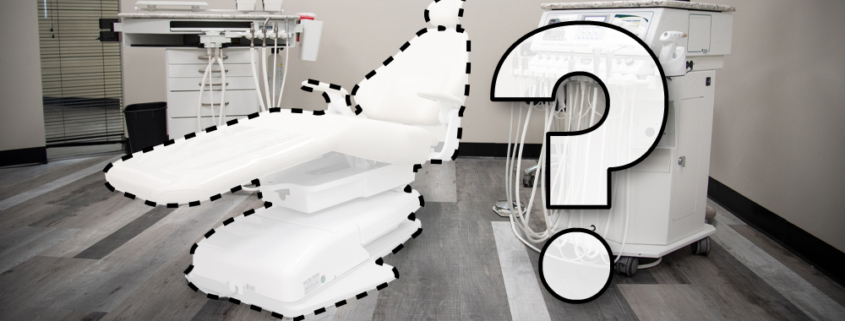
Is this what your patients think a dentist’s operatory looks like?
Today, this common mounting method and delivery exists with little forward evolution from manufacturers still offering patient chairs with a post-mounted arm delivery unit.
 Advantages and Disadvantages of Traditional Arm-Mounted Delivery Systems
The one advantage of a post-mounted arm delivery off the chair is footprint that can fit into very narrow rooms. However, offsetting this advantage are negatives that should be considered in office planning.
Cluttered Appearance to the Treatment Room – A significant drawback to an arm mounted over-the-patient dental system is that it puts practical limits on the physical size and weight of the unit. These limitations then put constraints on the integration of advanced treatment instrumentation and computer technology. This can result in an additional roll-around cart holding this instrumentation to supplement the arm-mounted unit. As a result, ergonomics and treatment efficiency decline while clutter and extra cords in the room increase.
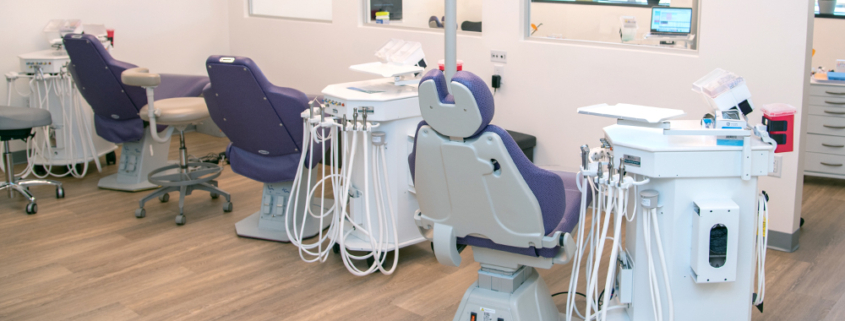
Makes for a Dated Patient Experience – Dentistry is in a continual battle of what patients perceive to be an uncomfortable experience. Often, patients will hold off seeing a dentist due to the perceived stress and anxiety of the visit. Adding constraining and claustrophobic arms over the patient does not help to change this perception. Regardless of how nice the reception room and staff demeanor are practice that attempts to market a “modern theme” to patients counteracts their efforts by reinforcing the traditional “Frankenstein” look of a dental operatory.
Limits Use of Other Technology – Dental treatment technology continues to evolve. That includes robotically assisted surgery, CT-assisted implant placement, surgical tables, microscopes, and lasers. Arm-mounted delivery is not always conducive to bringing and placing this technology as placement interferes with the travel of the arms. Rooms that also wish to be used for surgical suites cannot take advantage of dental surgical tables that glide over the chair due to the arms. Ideal modern treatment rooms utilize fully featured chairs that stand alone in the room and then this allows modular equipment to be placed in the most efficient areas.
Why Modern Cart-Based Dental Instrument Delivery is Better
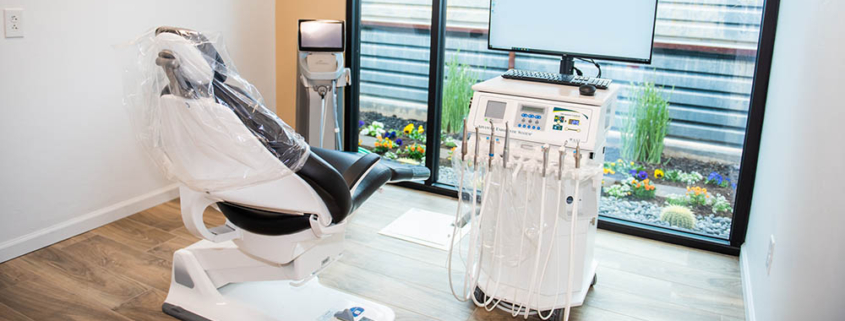
#1 Enhances Patient Experience – Not having equipment and arms mounted off the chairs provides a clean uncluttered appearance that is more inviting and relaxing to the patient. Not having patients see the handpieces in their peripheral vision on the chair is ideal for patient consultation and more conducive to discussing treatment plans with them. Once a patient is reclined back, then the handpiece delivery cart can be rolled into place next to the chair for treatment.
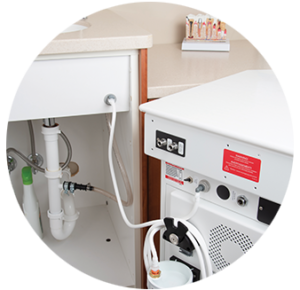
#2 Treatment Room Design Advantages with Cart-Based Delivery Systems – Chair-mounted units generally require a fixed location on the floor to bring utilities in from the floor and placement must be exact or can result in less-than-ideal positioning for the chair. Mobile carts on the other hand provide full flexibility in locating the patient chair anywhere including diagonally in the room. Carts have umbilical cords that connect to wall-mounted junction boxes so can be pushed out of the way and brought into the placement preferred by the dentist or the assistant. ASI dental carts provide full instrument integration, wide work areas, and storage thereby eliminating the need for expensive and low-functional dental cabinets. This opens the treatment rooms visually and can readily accommodate technology in the design of the room.
#3 Improved Ergonomics for both the Dentist and the Assistant – The unlimited maneuverability of carts allows for ideal placement of carts as well as rotational movement for convenient access to handpieces as the treatment procedure advances.

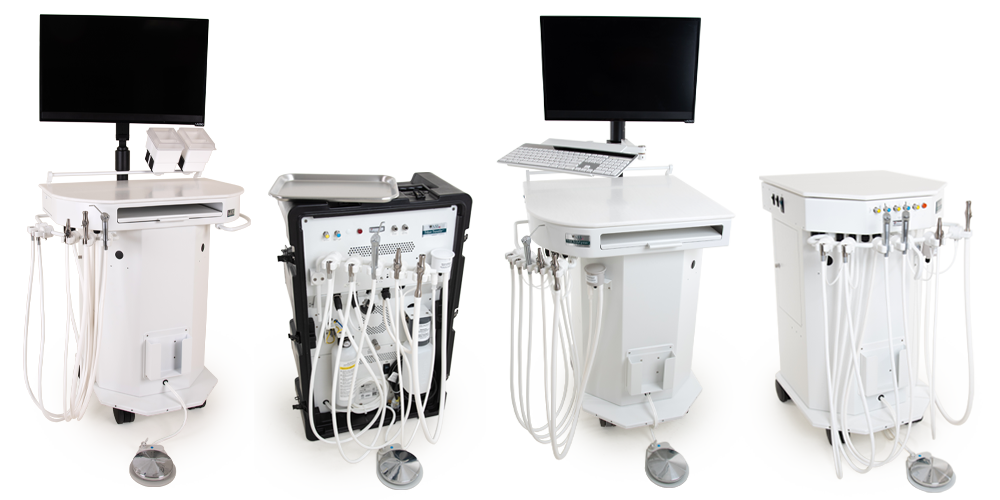
Ideal cart-based delivery provides one cart for the dentist in the front side position of the chair for ease of access to the handpieces.
A second wider “all in one” cart then is provided for the assistant that places the cart in the best position for them and accordingly to the patient.
 In addition to the standard assistant handpieces, the assistant carts are also equipped with a side and back-mounted rail system to allow convenient bracket-mounted storage for items like glove boxes, sharps containers, disinfecting wipes, and portable x-ray mounts. In addition, convenience outlets for air, water, and electricity can be used to operate tabletop instruments and power charging bases of cordless instruments. Additionally, nitrous oxide systems can be mounted to the assistant cart to provide convenient placement for the patient. The complete assistants’ cart system also can include computer and monitor mounting.
#4 Advanced Modular Instrument Integration for Modern Treatment – Modern ASI Dental Carts provide robust construction and allow a high degree of dental instruments that provide advanced type procedures from endodontics to implants. This creates a simplified yet high-tech look for the treatment room with instruments operating from only one-foot control.
#5 Computer and Diagnostic Integration – Remove the appearance of cabling and control box clutter. The chassis of the carts provide stability but also includes computer and diagnostic add-ons to the same cart with computers, Monitors, USB connections for digital x-ray sensors, air quick connects to supply lasers, etc. This provides the elimination of clutter from power cords, control boxes, and computer cables.

Copyright 2025 All Rights Reserved. ASI Medical, Inc. DBA ASI Dental Specialties


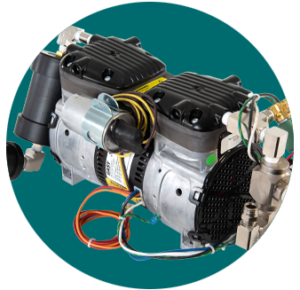 Tip #2 Insist on High Grade Portable Dental Compressor and Vacuum Pumps
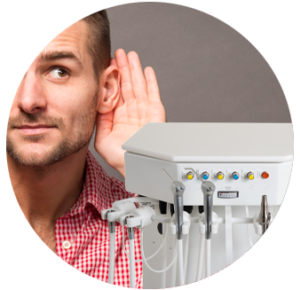
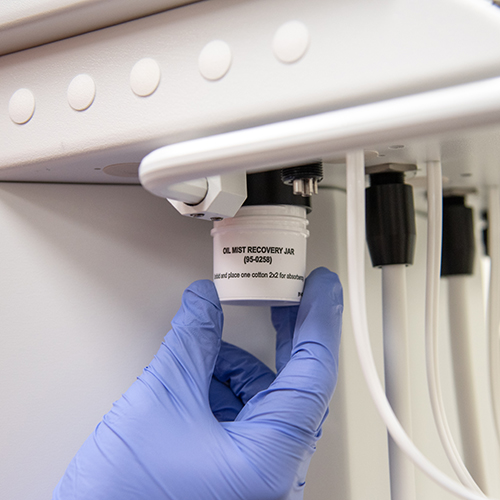
 Tip #8 Consider Suction Canister Purging Ability
 Tip #11 Uses Standard Electrical Outlets
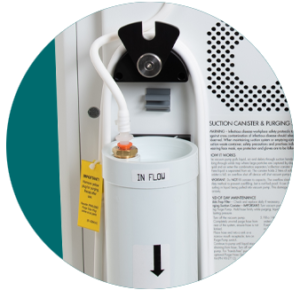 Tip #14 Has Amalgam Separation Option